First Wardrobe Project - An Irish Cloak, Reimagined
Having no experience in fashion design, my first attempts at this were necessarily clumsy and difficult. What I wanted was something very out of the ordinary - something detached from common, contemporary fashion. I also needed to see dynamic forms and color relationships that would offer compelling visual elements for a painting.
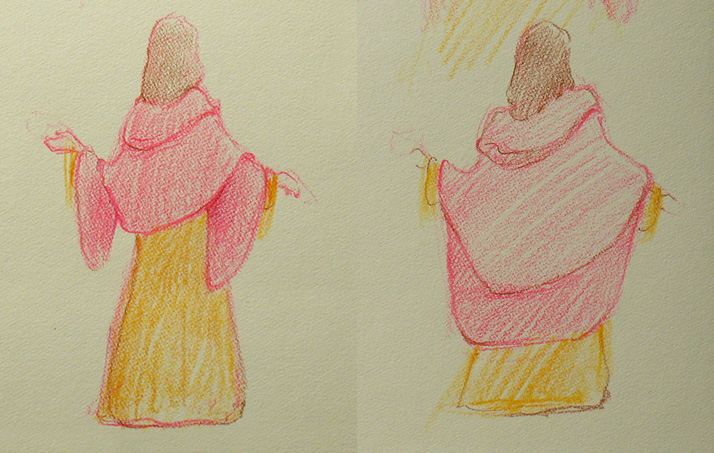
I began by envisioning only a dress, but gradually saw the benefit of adding a second layer to the garment, in the interest of contributing additional colors and forms. Initially, I thought that this second layer could be a simple shawl over a two-tone dress, as in the early colored pencil and pastel sketches below:
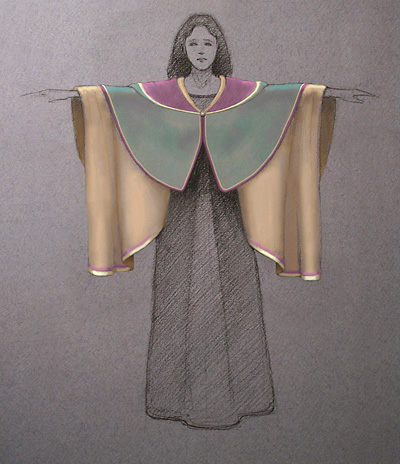
Eventually, the shawl became more like a cloak, and acquired a hood. I considered shorter and longer varieties of such a cloak, as in the two examples below:
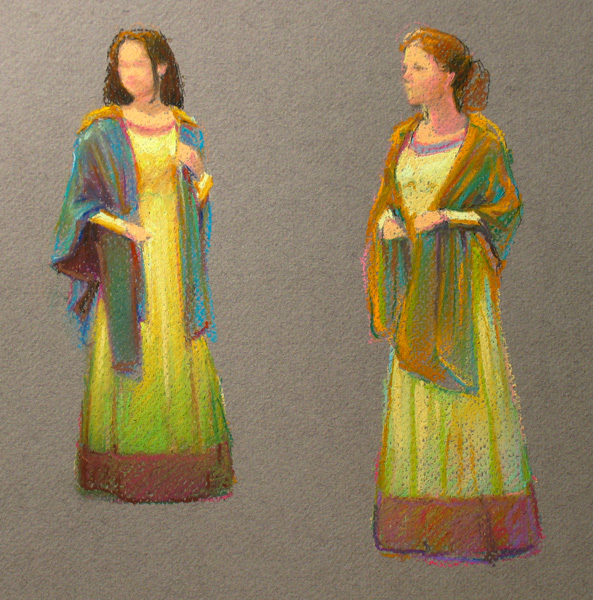
Eventually, this led to a fully-developed, hooded cloak, with long, draping sleeves fixed below a separate upper layer, whose front surface would split into an inverted v-shape; this split would allow for wider extension of the wearer's arms and would also provide an expanded view of the vertical drapery of an underlying dress:
The design was largely inspired by traditional cloaks of Ireland. But traditional Irish cloaks tend to open down the front and remain closed along the sides, allowing the wearer to only extend her arms forward; this restricts the model to vertical, columnar poses that aren't especially dynamic for pictorial purposes. I needed my model to be able to reach out to both sides and to hold walking sticks and other props, allowing for a wider variety of interesting poses. For that reason, I developed my own design with sleeves that open along the sides. Ultimately, the final result looked like this:
But I was helpless to produce this thing myself. Thankfully, I discovered a skilled dressmaker, Jennifer Oberg (Jennifer Oberg Atelier), who was willing to take me seriously. She began her own work through a series of rough "sketches," also - but her medium was an inexpensive, colorless fabric called muslin, in which she could determine a pattern for the final garment through trial and error. Jennifer was patient enough to make three or four of these muslin samples before we found just the right arrangement of shapes and proportions to most closely match my concept drawings.
Below, my model, Erin, tries on an unfinished dress and one of the first muslin cloaks so that we could judge the success of the pattern. For the sake of comparison, the hood was designed differently on each side in this sample, with one side fuller and more open than the other - we ultimately chose the more open variety for the final garment. Here, Erin also holds the candlestick prop that I had just finished constructing:

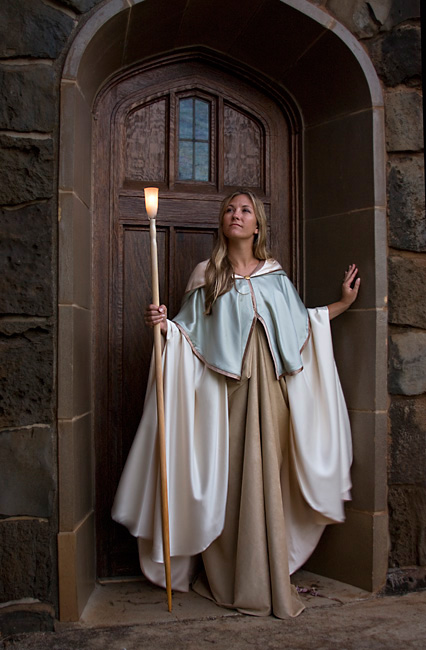
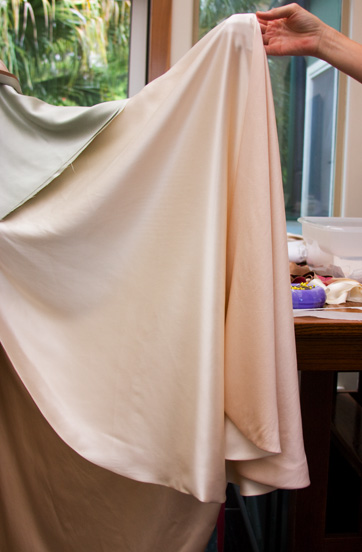
In most respects, the final garment was quite true to my original vision. It was completed entirely in the finest, sueded silk charmeuse, giving the cloak a luxurious quality that carries it to the level of an authentic garment, rather than some goofy costume. Below, the cloak well advanced, but still in progress, at Jennifer's studio:
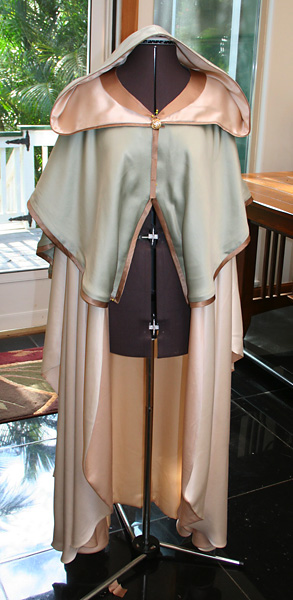
An important element for me was the drapery of the long, falling sleeve, especially as seen from the front - we achieved the desired appearance by designing the sleeve as a wing-like shape much longer than the model's arm, so that the excess fabric would bundle upon itself in an attractive way when allowed to fall from the wrist under the pull of gravity. The interior color of the sleeve is slightly brighter from that of the exterior, so that both colors are revealed as the inner and outer surfaces overlap one another:
Jennifer understood that I was looking for the highest quality result possible, in order to maximize the credibility of the garment, so she attended to every detail with care. In the photos below, Erin wears the final dress and cloak. With the combination of a medieval setting at an old church and some mood lighting at twilight, the garment really came to life:
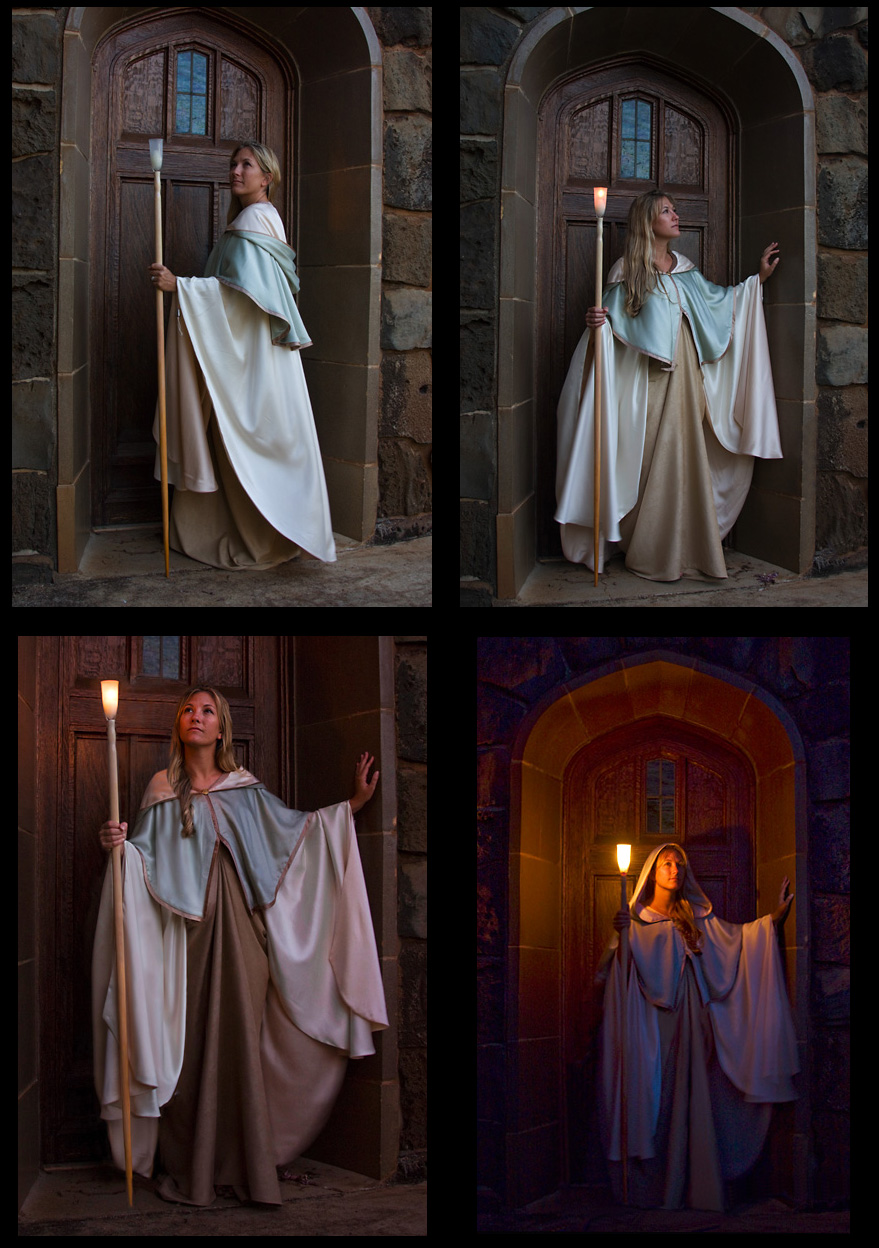
The staff equipped with a candle-holder was an essential part of this. I had wanted to be able to place a warm light source very near Erin's face, to illuminate her at twilight, and this was my solution.
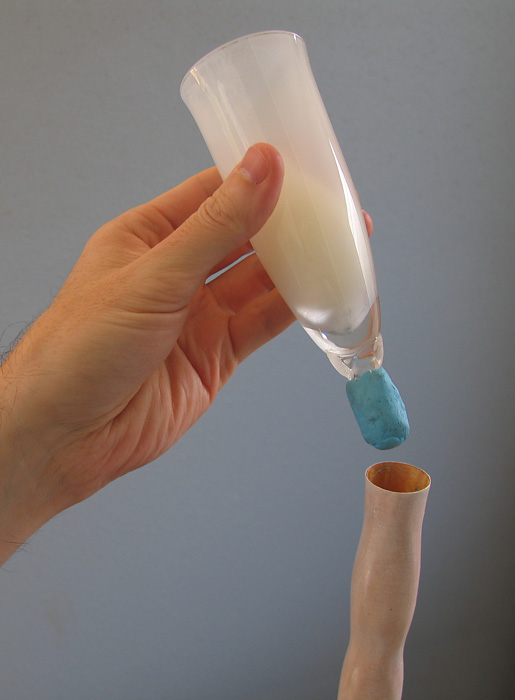
The glass candle-holder was initially an ordinary champagne flute. Like most champagne flutes, the one that I selected had a wide base connected by a narrow stem, and all of that had to go. I chopped off the base about half-way up the stem using a Dremel rotary tool and a specialized bit for cutting through glass.
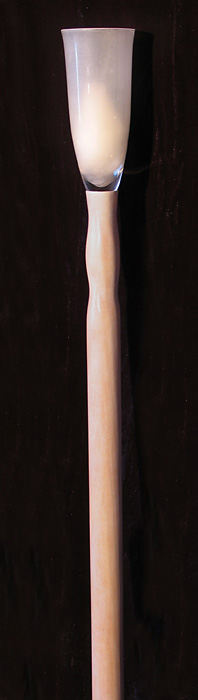
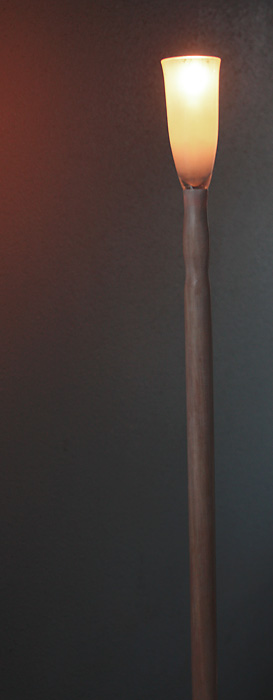
Then I gave the interior of the glass a frosted appearance by scratching it with medium-grit sandpaper - I frosted only the interior, leaving the exterior smooth and shiny to catch reflections and highlights.
For the stick, I purchased an ordinary pine-wood pole from the hardware store, and hollowed out one end with my Dremel tool. The wood is nearly paper-thin where it meets the glass. To secure the glass in the hole, I wrapped the remaining portion of the stem with a sticky material that's commonly used in schools as a replacement for tacks and pins - it's sticky enough to hold the glass in place, but flexible enough to remove the glass when necessary.
With the addition of a candle carved to fit the interior of the glass, the project was finally complete.